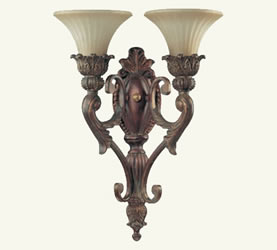
Figure 1 - Sconce light fixture
Installing sconce light fixtures on a wall that does not currently have wall mounted light fixtures can be a difficult project, however if the top of the wall is accessible from the attic or the bottom of the wall is accessible from an unfinished basement, installation of sconce fixtures is possible.
This article assumes that the reader is familiar with electrical connections. If additional information is required on wiring switches and light fixtures please see the electrical index.
The basic electrical schematic diagram for the installation of wall sconces is no different than any other light fixture.
Preplanning is the key to a successful wall sconce installation.
Tips: Planning Your Wall Sconce Installation
- Installation of sconce light fixtures on the inside of an outside wall will be more difficult than installing the fixtures on an inside wall because of the need to fish electrical wire to the fixtures through the insulation that exists in an outside wall. In some cases accessing the top of the outside wall in the unfinished attic is very difficult due to roof slope.
- Installing sconce light fixtures on a wall where there is no access to the bottom or top of the wall such as unfinished attic or basement is almost impossible without doing some damage to the drywall covered walls.
- The installation effort of sconce light fixtures can be reduced if you purchase fixtures that have on/off switches incorporated as part of the fixture.
Installing Your Wall Sconce Light Fixtures:
- Use painter's masking tape to identify the positions of the sconce light fixtures and the location of the switch or switches before commencing to cut or drill any holes.
- Once you have marked the locations, stand-back and determine:
- Where you will get the power from - this has to be from another light fixture, wall switch, receptacle or directly from the distribution panel. Some light fixtures and wall switches will not have live power available. It is important to determine, by removing light fixtures or wall switch cover plates, the availability of live power at the location that you have chosen.
- Remember that bathrooms often have dropped ceilings for exhaust fan ducting. A dropped ceiling can add to the complexity of fishing wires through walls.
- A wire must run from where you are obtaining the power to either the sconce light fixture or the wall switch. If you are not including a wall switch the power only has to run from the source to a fixture and if more than one fixture from the source to each fixture or from the fixture with the live power to the next sconce fixture. Determine how you will run the wires.
- Drill a 1/4 inch hole in the center of the spot for the wall sconce fixtures electrical box and do the same for the switch box. Remember that the position of the electrical box, depending on the style of sconce light fixture, may not be the center of the light fixture. Insert a metal hanger in the hole to ensure that the wall is clear of any obstructions such as plumbing pipes.
- Draw the outline of the electrical boxes on the wall, keeping the 1/4 inch hole in the center of the electrical box. You will require "old work electrical boxes" for both the sconce light fixtures and the wall switch. DO NOT INSTALL THE BOXES AT THIS TIME.
- Run the electrical wire, 14/2 Romex with a ground, from the source to the switch and or light fixtures and to each light fixture. Leave the wire hanging out of the holes that you made in the walls for the electrical boxes. If you require more than one switch in the circuit it will be necessary to install 14/3 with a ground wiring in part of the circuit and use 3-Way and/or 4-Way switches.
Additional information on the use and wiring of 3-way and 4-Way switches.
- Run the wires through the knockouts in the electrical boxes and then insert the electrical boxes into the holes in the walls. Tighten the hold down clamps on the electrical boxes and ensure that they are securely mounted in the wall.
- Turn the power off on the circuit that you are sourcing the power from and appropriately connect the 14/2 Romex wire.
- Mount the sconce light fixtures on the wall electrical boxes.
- Install the switch in the electrical box and mount the cover plate.
- Install the appropriate size and style light bulbs in the sconce fixture sockets.
- Turn the circuit power back on.
The Installation is now complete.
