Additional Toilet Information
Condensation on toilet tanks is created because the tank is colder than the surrounding air. The tank is colder because of the cold water that is entering the tank each time the toilet is flushed. In most cases homeowners find that the condensation is more prevalent in summer months when the ambient air is carrying much more humidity.
There are four methods that one can use to eliminate or greatly reduce the condensation on the toilet tank. Besides the four methods described, homeowners should evaluate their bathroom ventilation systems to ensure that they are removing excess moisture from the room.
- Toilet Tank Cover

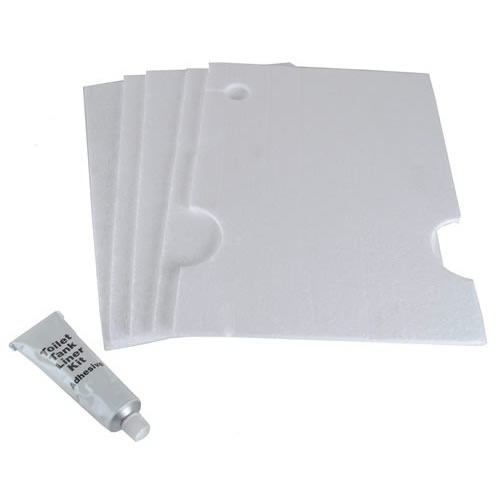
Figure 1 - Insulating toilet tank liner

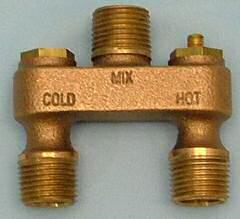
Figure 2 - Toilet tank mixing or temperature valve
Toilet tank covers were very popular in the 60s and 70s. However, they do not appear to be in style at the moment. Finding a cover that suits the aesthetics of your bathroom may be difficult.
- Insulating Toilet Tank Liner
- Mixing Valve
- Wax
Insulating liners, as shown in Figure 1, are available as kits at most hardware stores and the big box home improvement centers. They are made from a polyurethane foam and glued to the inside of the toilet tank, providing an insulation barrier from the cold water to the porcelain tank.
A toilet tank mixing or temperature valve, as shown in Figure 2, while a little more complex to install will definitely solve the condensation or sweating problem of the toilet tank.
The mixing valve adds hot water to the cold water entering the tank. By setting the tank water temperature to the approximate temperature of the room, condensation cannot form.
There are numerous styles of toilet water mixing valves and they are available at most plumbing supply stores.
Although not a guaranteed solution, applying a wax to the inside of the tank will act as an insulator to prevent the cold water coming into direct contact with the porcelain. This is an inexpensive solution if it solves the problem and is probably worth a try.
To install the wax, turn the water off to the toilet, flush to drain the water from the tank, using a sponge remove the water that remains at the bottom of the tank, allow the tank to dry thoroughly (the use of hair dryer will speed things along), apply the wax to the walls and bottom of the tank, turn the water back on and allow the tank to refill.
Any wax will do, a good car or floor wax is an excellent choice.
Click on picture for larger view

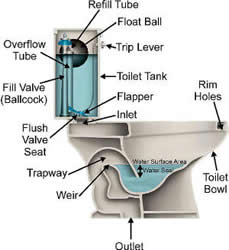
Figure 3 - Drawing of a toilet and its parts
