Joists are installed based on the configuration and structure of the home. Cutting and/or removing joists to provide an entry or access can be the most difficult part of the overall project.
In order to maintain the support integrity of the ceiling or floor joist or rafter system, it is important that if joists are cut that the load that was bearing on those joists be transferred to a modified support system.
If you need an explanation of support walls in construction you can find additional information at: Load Bearing Walls
A common mistake, made by the diy home handyman, is to remove a portion of the floor or ceiling joists and not replace or add additional support members because the floor or ceiling still feels and appears to be as strong as it was before the joists were cut.
Builders seldom add more material than is necessary to meet code and the code is based on certain load and stress factors.
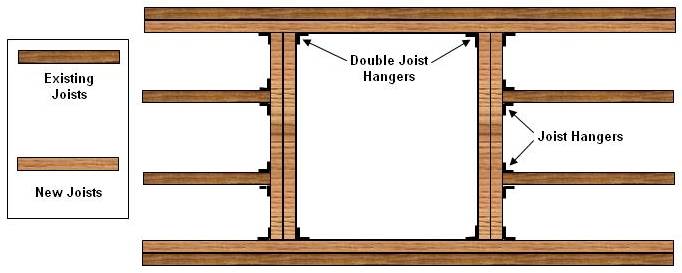
The following diagram (Figure 1) shows the floor or ceiling joists after the access hole has been cut to install a new flight of stairs or provide an attic access.

Figure 1 - Modified Joists
There are some important points to highlight.
- Remove any insulation that is directly in your work area and remember to replace it after you have completed the new joist installation.
- Install the two main replacement support joists (the ones that run parallel to existing joists) before you cut the existing joists. This will help to prevent any floor or ceiling sag that may occur when cutting out the pre-existing joists.
- It may be necessary to add temporary support to the floor or ceiling while the construction is in progress. To learn how to build a temporary support frames see the information at Load Bearing Walls. It may be noted that it is easier to add temporary support than it is to fix a sagging ceiling or floor after it occurs.
- Always use a double joists to surround the new opening.
- There should be no flex in the joists after the new joists are installed. If there is flex, you must make all the double joists into triple joists.

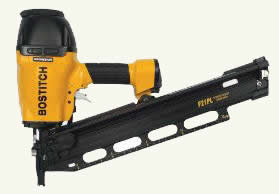
Figure 2 - Bostitch Framing Nailer
Installation Tips:
Use a pneumatic or electric nail gun as shown in Figure 2. The vibration of driving nails into ceiling or floor joists will cause drywall screws and nails to loosen. Using a nail gun all but eliminates the vibration. Using a nail gun will also save your arms and wrists and make for quicker project completion.
Install two nails every 6 to 8 inches across the full length of the new joists, from both sides if possible.
Using construction adhesive across the length of the new joists and where joists are doubled adds a secondary level of strength to the structure.
You can also use this methodology for the installation of a skylight, if the ceiling joists have to modified in order to make it fit properly.
